01 Introduction
Introduction
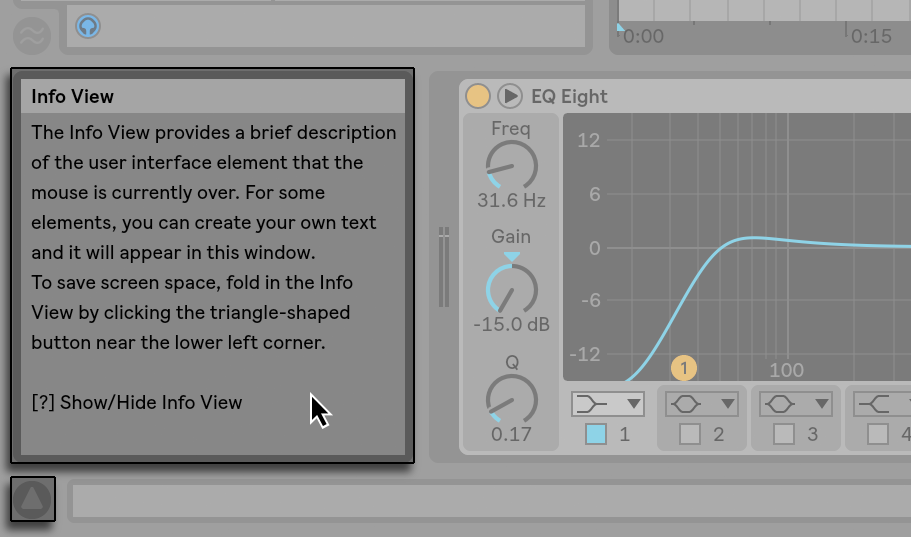
1. Info View
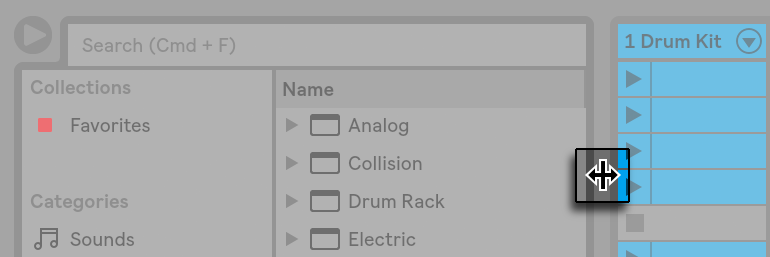
2. Selector Buttons and Re-Sizing Windows
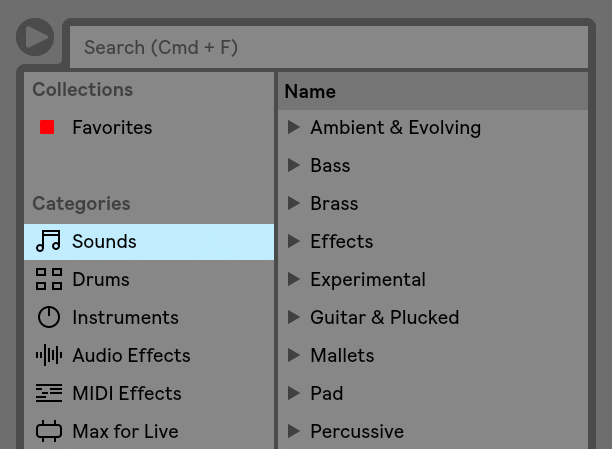
3. Browser
4. Activate the Computer MIDI Keyboard

 |
| Source: https://www.schoolofsynthesis.com/blog/blog-post/playing-notes-your-computer-keyboard-ableton-live |
For future reference, there are full tutorials on The Computer Keyboard as a MIDI Controller
Also in video format https://sonicbloom.net/en/ableton-live-tutorial-the-computer-keyboard-as-a-midi-controller-video-tutorial/
5. Hands on Task
Navigation
6. Load the Tour of Live set
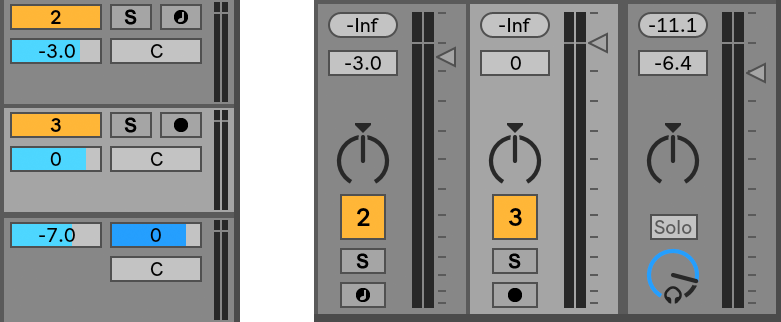
7. Mixer (Volume Controls)
8. Zoom in and out
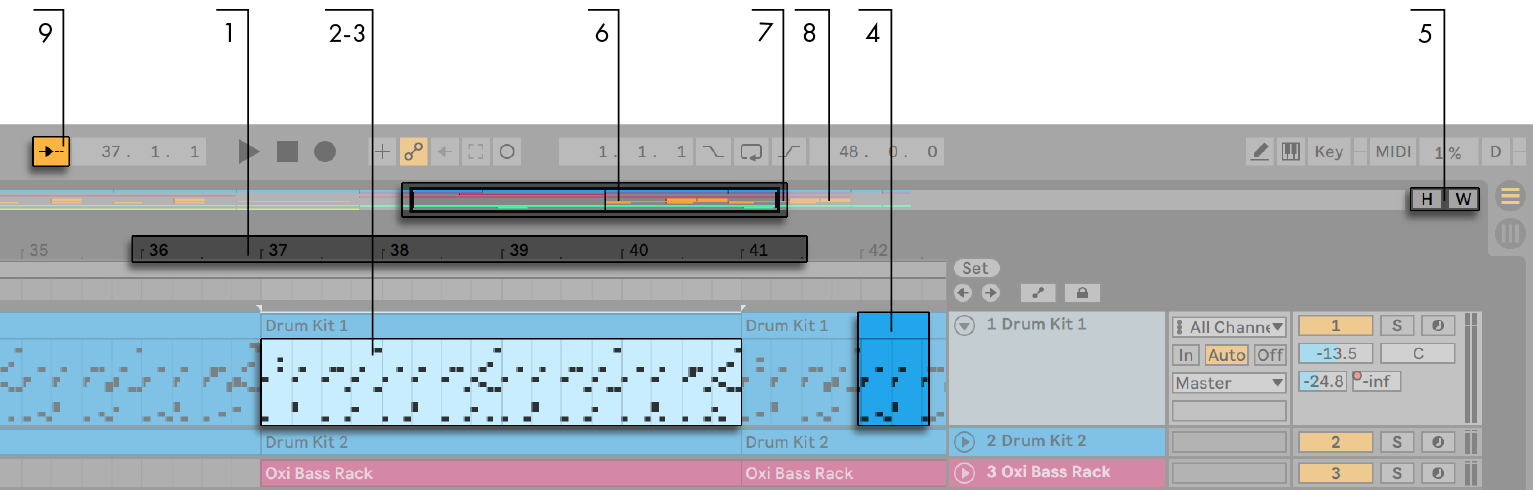
1. To smoothly change the zoom level, click and drag vertically in the beat-time ruler at the top of the Arrangement View -
2 and 3. To zoom in and out of a selected Clip, use the computer keyboard’s + and - keys
4. To zoom into a selected Clip selection completely, press Z. You can revert back by pressing the X key.
5. To optimize the height of all tracks to fit the Arrangement View, click the H button or H key. To do the same for width click the W button or W key.
6. The Arrangement Overview is like a “bird’s-eye view“ of your music. To scroll the display, click within the outline and drag left or right; to zoom out and in, drag up and down.
7. To which part of the Arrangement you are seeing, drag the outline’s left and right edges.
8. To see a specific part of the Arrangement in more detail, click on it in the Overview and drag downwards to zoom in around that part.
9. To have the Arrangement display follow the song position and scroll automatically, turn on the Follow switch
Additional:
10. You can split Clips using the right mouse button or the CTRL-E key command.
11. You can re-size Clips by clicking and dragging on the left or right edge of the Clip, once you see the cursor become a square bracket [ or ]
12. You can Cut and Paste clips by selecting them with mouse, then either right-click or use the usual CTRL-C, CTRL-X and CTRL-V key commands
Comments